Sunday, April 27, 2014

Country Livin'...

Just a couple of quick snap shots to keep everybody 
up-to-date on Julian's favorite new pastime: 
Mud Puddles!!! 


 Having the time of his life!! 
(Though his pants have seen better days!!!)


When procrastination becomes permanent: Fighting back!

Right before Thanksgiving last Fall, John and I violently squeezed an incredibly old and unreliable electric stove into our pantry.

"What?!?" you just said. 

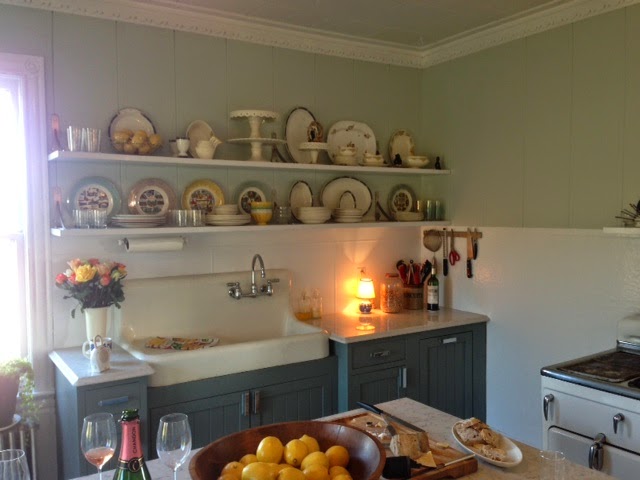
Yes. We purposefully and without ease moved a really crappy old stove (it came with the house, to give you some sense of its condition) into our pantry so we'd have a second cooking surface and extra ovens to use over the holidays. It was brilliant. Or pretty brilliant. (It turned out that only one of the ovens actually worked properly. The other produced a series of fireworks we deemed to be "dangerous" and didn't explore further.) In our defense, the other oven and all four burners worked perfectly, we cleaned the hell out of it, and it ended up being used almost nonstop from Hanukkah through to New Year's. Fastforward to...

April 25th, 2014. Yes. It has been almost exactly 5 months, to the day, since we moved that wretched stove into the pantry and it was still there! You need to understand that getting it in there was a true feat of physics and spatial relations. It involved me actually climbing through the pantry cupboard from the dining room into the pantry so I could squeeze behind the stove to get it in. I can't emphasize enough how hard it was to get it in there. It weighs 1980's amount of stove-- it's one of those double-height numbers-- THIS WAS NO EASY TASK!!! It was like trying to parallel park a full-length sedan in a spot intended for a compact car. It could be done, there was just a lot of "forward, shift, backward, shift, forward, shift, backward."  John and I were daunted by the unpleasantness of getting it back out. There would almost certainly be some muffled profanity (muffled because Jules would be napping, as there was no way we could move it while he was awake. But make no mistake, just because the profanity was muffled in reality, it would be screaming in our heads.) We figured the walls would get all scratched up again (Yep. We did that the first time too.) And if we were going to be honest, we just didn't really want to deal with it. 

I confess. It was a quintessential case of procrastination. 

Until yesterday. We recently discussed the ongoing presence of the stove (coming up on it's 6 month anniversary was not a good thing...) and decided that it was time to face our demons. John's parents had made a plan to stop by the farm house yesterday and we declared "Now or never!" and decided to tackle the thing!!!

 And guess what?!? It took about 30 seconds to get it out of the pantry. I'm not kidding. I don't know how or why (John's says we mastered the process on the way in, so we already knew how to get it out. I'm thinking maybe we just stretched the room on the way in, so there was enough room on the way out...) but either way, it was literally like, "forward, shift, backward, shift, DONE." 

Hooray!! The pantry has been liberated!! 

And it looks so much better without that over-sized nasty 1980's stove inside it!! The moral of this story is probably something like, "Avoidance is not the best policy" and sometimes you find out your avoiding something for no freaking reason and you should have just done it after New Years. 4 months ago.

Lesson learned? I wouldn't count on it.

Saturday, April 19, 2014

Parents on the lam!

Fellow American Dream Builders (left-to-right):
 Erinn Valencich, Nina Magon, ME!, Vanessa Deleon 
John and I are foot-loose and fancy-free down in Texas right now! We're here ostensibly for an American Dream Builders event that was held in Houston this past Thursday night, but we decided that since we were going to fly down, we might as well make a weekend of it, and we drove down to Austin to visit our best friend Seth. It should be noted that this is the first baby-free vacation we've taken since Jules was born in August of 2012.
Catching sunset and happy hour in Austin! Baby-free has its perks...

Holy moly. This was a long time in the making!! 

Needless to say, we're having a grand time, eating, drinking, being merry, catching up with friends and exploring new cities. So far WE LOVE TEXAS! And luckily, we're getting videos like this sent to us, which is making it a little easier to be away from home.


That's one crazy baby. Can't wait to see him soon!

The sweeter side of passover...

John's uncle Howard made this passover-friendly dessert and it received rave reviews. Literally it was inhaled by a crowd of twenty in about 5 minutes.

I saw it, and then, I didn't. 

Chocolate Toffee Matzo Brittle
Makes 24-35 squares
Prep time: 10  minutes
Cook time: 10 minutes
Cool time: 45 minutes
Ingredients
• 3-5 matzos (depending on the size of your cookie sheet)
• 1 cup (2 sticks) unsalted butter
• 1 cup packed brown sugar
• 1 12-ounce bag semi-sweet chocolate chips
• 1 cup chopped pecans
• 1/2 teaspoon sea salt flakes
Directions
Preheat oven to 350 degrees.
Cover a rimmed baking sheet with heavy duty aluminum foil. Coat with cooking spray. Then cover the baking sheet with matzos, cutting and piecing together to fill the whole pan.
In a medium saucepan over medium heat, combine butter and brown sugar.  Cook, stirring constantly, until mixture comes to a boil. Continue cooking and stirring for another 3 minutes until foamy and thickened. Immediately pour toffee over matzos and, using a spatula, gently spread into an even layer.
Place pan into the oven and bake for about 10 minutes, or until the toffee topping is bubbling all over. Remove pan to a cooling rack.  Immediately scatter chocolate chips evenly over top. Wait 3-5 minutes for the chips to soften, then gently use a thin spatula to spread chocolate into an even layer. Sprinkle with pecans and sea salt.
Refrigerate until the chocolate is firm, about 45 minutes, but not much longer or it will be hard to cut.
Lift foil to transfer matzo onto a large cutting board. Using a large sharp knife, cut into 2-inch squares. Store in an airtight container in the fridge and serve cold.

Wednesday, April 16, 2014

Completely awesome kosher-for-passover-super-food recipe to take for everyday.

And by that, I mean EVERYDAY. 

John and I made this delicious quinoa* dish over the weekend for the twenty people attending his aunt's seder, and-- if I may toot my own horn-- it was a smash hit. We then ate it again for breakfast and again for dinner, and we're still loving it. In my opinion, that speaks volumes about a dish, if I can eat it for three out of four meals and still blog positively about it at the end.

It's a straight forward recipe, but full disclosure-- there are a lot of steps. Worth every one, I swear, but I just want to be straight with you from the outset.

*There was some uncertainty about whether quinoa was in fact kosher for Passover. After much debate and one speedy google search, it was determined that it was in fact kosher, as well as many other wonderful things-- like highly nutritious, a "complete food", and apparently 2013 was the "International Year of Quinoa." Thank you google. I now know more than I'll ever need to know about the history of quinoa. 

According to Melissa Clark of the New York Times, "As for the pomegranate molasses, it's available in specialty shops and online, but if you don’t have it, substitute a good quality balsamic vinegar spiked with a little honey if you like. You can toss together the quinoa, dressing and carrots the day before serving, but don’t add the arugula until the last minute to keep it as fresh and crisp as possible." We couldn't find pomegranate molasses either, so we actually bought pomegranate juice, splashed a little balsamic vinegar into that, and then boiled that concoction on a low-slow-boil for almost an hour until it was nicely reduced. Either way would probably do the trick nicely. 
Our version actually came out looking like this-- always a reassuring sign!


INGREDIENTS

  • 1 leek, trimmed
  • 3/4 cup plus 2 tablespoons extra-virgin olive oil, more for frying leeks and for serving
  • Kosher salt and black pepper
  • 2 1/2 tablespoons lemon juice (in my opinion, this needs more lemon juice, but I'm a tart-lovin' gal. Increase quantities as you see fit...
  • 2 1/2 tablespoons pomegranate molasses, more for serving
  • 2 pounds carrots, peeled and sliced into 1/4-inch-thick coins
  • 2 cups quinoa (13 ounces)
  • 1/3 cup dried currants
  • 6 ounces fresh arugula

PREPARATION

1.
Cut leek in half lengthwise and rinse away any grit. Slice thinly. In a small skillet over medium heat, warm 1/4 inch olive oil. Add a handful of leeks and fry until golden brown, 15 to 30 seconds. Remove with a slotted spoon and transfer to a paper-towel-lined plate. Sprinkle lightly with salt. Repeat with remaining leeks.
2.
In a small bowl, whisk together lemon juice, molasses, 1 teaspoon salt and a large pinch of pepper. Whisk in 3/4 cup oil.
3.
Heat oven to 425 degrees. Toss carrots with 2 tablespoons oil, 1 teaspoon salt and some pepper. Spread on one or two large baking sheets so they fit in one layer. Roast carrots, tossing occasionally, until tender and golden brown, 30 to 35 minutes.
4.
While carrots roast, bring a large pot of salted water to a boil. Add quinoa and cook until tender, 10 to 12 minutes. Drain.
5.
In a large bowl, toss warm quinoa with currants. Add carrots and half the dressing and toss well. Taste and add dressing or salt (or both) if needed.
6.
In a separate bowl, toss arugula with enough dressing to lightly coat. (Leftover dressing will last for five days stored in the refrigerator.) Spread arugula on a serving platter. Top with quinoa and the frizzled leeks. Drizzle with more pomegranate molasses and a little olive oil before serving.
YIELD
10 servings


Tuesday, April 15, 2014

Wishing Everyone A Happy Passover!

John and I just celebrated another wonderful passover with much of his immediate and extended family. We whipped up these super simple decorations (originally found in Better Homes & Gardens) to bring some festivity to the table scape, and I thought I'd walk you through them so you can do them at home too.

(If you've been reading this blog for the past few years, first, let me say, Thank you! Then let me say that this project might feel familiar because I've blogged about it every passover. Sorry I haven't conjured up any original, new ideas, but I think they're so cute and SO EASY, they really do merit a re-blog.)


Materials Needed:

25- Little Terra Cotta Pots (ideally about 2.5" tall)
25- Little Parsley Plants (I actually bought 6 biggish plants of parsley and then split them up to keep the cost down, but either way would work)
25- Little Plastic Planter Tags or 25-popsicle sticks (which I am writing each guest's name onto...)
A surprisingly small amount of time... 
Colorful ribbon if you're feeling particularly Martha-Stewart-y

Serves 25 guests!

Instructions: 
This project is so straight forward, it almost doesn't require instructions, but just in case something isn't clear...

1.) Layout a layer of newspaper and then line up your little pots.
2.) Split the larger parsley plants into smaller portions. The idea is not to tear this plants to smithereens, but if you look at a larger plant, you can see how it is composed on smaller bunches. Break up according to the smaller bunches. Go gently. 
3.) Put individual bunches into individual pots. Press down the soil lightly around the bunch so the plant sits firmly and securely in the little pot. 
4.) If you're feeling really crafty, you could even wrap a little piece of ribbon around the top of each pot and curl the ends with a pair of scissors. Then you're really channeling Martha! 
5.) Write the names of each of your guests onto a popsicle stick and wedge it into the pot. When you're setting your table, place each little pot to the left of the water glass on your table, and you're ready to go!! 

While hunting around guiltily for new passover inspirations, I found some other terrific ideas that I want to tackle for next year's celebration... 

I totally love Martha Stewart's idea of writing each guest's name in chocolate on a piece of matzo! That's so much fun-- but let's be honest-- that's also pretty freakin' labor intensive so I think I'm going to have to save that project for a seder with fewer guests or more organization. The idea of sitting around writing 20 names in scrolly chocolate cursive while all of that cooking and craziness is whirling around me seems down-right loony. 

Leave it to Martha. She's probably got a staff of indentured servants writing festive sh-#$ in chocolate on any given day. 


No wonder she can bang out a fabulous Seder meal, do lots of chocolate writing, orchestrate glorious flower arrangements, and still have really tidy hair. 

Other new favorites include the parsley-bunch-name-tag, shown below, which looks wicked easy, bright and cheery. Consider me sold on that one. Kind of tempted to do this setting for any ol' dinner party, not gonna lie. 


And I'm liking the scallion-tied-to-a-napkin too. After a little research, I found out the origin of the scallion in the Passover tradition, and I'm diggin' the whole thing. Apparently, "During the seder song, "Deyanu," the scallions become symbols of the taskmasters' whips when we use them to lightly beat each other on the back and shoulders. Everyone collapses with laughter, but it is a potent reminder to appreciate our freedom. To incorporate this tradition into your table, tuck a trimmed scallion into each napkin and secure it with the ribbon." 


Beautiful and practical. Liking it.

Friday, April 11, 2014

Going against the grain. Because that's how I roll.

The last decision to be made in our "Lowe's Never Stop Improving" (wink) kitchen renovation was what was going overhead. Overhead you ask? Yep. Because I wasn't planning to install upper cabinets in my kitchen, I decided to install open shelving instead. I scoped out a couple of different inspirational images to guide my shelving positioning and selection, and then decided to ignore the way everyone had done everything and did it slightly differently instead.*


It seems the standard methodology is to install open kitchen shelves with a whopping great decorative bracket supporting the shelf from below. I was just not feeling that at all. In our kitchen, we already had so much happening on the shelf wall (refrigerator, window, radiator, half-wall-of-tile, farm sink... You name it, we had one!) and the thought of adding some hulking, scrolling cornice to the whole affair just felt like it was going to make it look so ungapatchka (yes. I did just say that! I've provided a link for those of you who aren't familiar with the term. If you don't know what it means, you probably don't live in New York.)


After much discussion about the logistics (and physics) of my plan, I persuaded John and my friend Ty to help me install the shelves with the brackets supporting the shelves from above. We're still not completely sure that this should be secure according to gravity, but they are bolted and anchored into the wall nine-ways-from-Sunday and it feels like you could do chin ups on them. Which I promised John I wouldn't try. Just in case.


I'm loving how they look-- essentially it's the appearance of a floating shelf without the typical thickness of a floating shelf-- and then if you look closely there's a pretty, subtle bracket detail keeping everything afloat. Tremendous! 

And what better way to display my extensive collection of tacky vintage state plates?!?! 


(These beauties aren't actually a part of my collection, but I've got about 12 more equally tasteful versions!)

*Okay. I just had to mention this. Scroll back up and look at that first kitchen picture I included. I'm not trying to get too snooty up in here, but I'm just baffled by that kitchen. Look at that beautiful sink, the lovely beadboard wall detail, those terrific green cabinets, and that pretty mullioned window. Look at all of the work and thought and consideration that went into the design of that kitchen. And THEN! Look at that freaking sconce. That off-center, crappy clam-shell of a sconce. What happened?!? It's like a black-eye on that kitchen's face. If there's one thing I learned from being on the show, the devil is in the details... 

Let that kitchen be a lesson to us all.  

Thursday, April 10, 2014

Once I had my plan... I needed some inspiration.

Once I'd nailed down how the cabinets were going to be configured, I wanted to spend a little time figuring out exactly how I wanted the kitchen to feel...

Silestone's Lyra in action! 
I was beyond psyched that Lowe's was going to sponsor my new countertops for my American Dream Builders "Never Stop Improving" segment, so that was the first decision to be made... After a fair amount of obsessing, I ended up choosing Silestone's Lyra quartz counter material-- mainly because what I really pined for was a Carrera marble counter top, but I knew that the maintenance of that was not in the cards for me. Silestone's Lyra is a close cousin, aesthetically, to Carrera marble, though admittedly, not as close as Carrera is to Carrera. That said--- the fact that I don't have to stress about staining Carrera (with almost anything), polishing Carrera (frequently), or resealing Carrera (every few years!)--- the resemblance to Carrera seems preferable to the real thing!!!

Once that decision was made, I moved onto the color of the cabinetry. I have a Russell Wright pitcher that is this completely hypnotic muted teal color, and it seemed like the perfect point of inspiration. I love the depth and saturation of the color, but I also love how it relates to the rest of the palette of our house, so it seemed pretty much perfect. And because I had Lowe's on my side for this renovation endeavor, I brought the actual pitcher into my local store and they literally scanned the freakin' thing and made a COMPLETELY PERFECT COLOR MATCH.

Holy f-ing science. They can do anything now. 

At this point, if you just can't stand the suspense, you can swing over to NBC's American Dream Builders Website to see the video of my fully renovated kitchen or... you could hold out and get more deets on our process and inspiration again tomorrow. : )

Wednesday, April 9, 2014

The beginning of our completely incredible Lowe's kitchen renovation!


I was thinking I'd just start at the beginning of this "Lowes-Sponsored What I Did After NBC's American Dream Builders" kitchen renovation project (that was a mouthful), and then cover all of the gory details, one post at a time. I started where one should always start in the kitchen project. Figuring out the layout.


Specifically, I began by tackling the riddle of how to convert the salvaged cabinets I bought from Built-It-Green-NYC last June into the kitchen configuration I was seeking now. This was made even trickier because I wanted to incorporate the "found" vintage farm sink that I lugged out of a collapsed house upstate. (Yes. We did a little low-level B & E in the name of architectural salvage. That's what makes us "spunky"!) So I had to figure out how to re-jigger the existing cabinets into another shape and layout, and then how on earth to support that whopping great sink so it didn't fall off the wall, crush the cabinet below, and fall promptly into the basement.


Because I'm a detail-oriented gal, and I didn't want to look like a chump on national TV again, I whipped up some pretty specific elevations and floor plans to keep us on track. And then we got to work, doing a good amount of sawing, hacking, swearing, and nail-gunnin'.

Eventually we got those buggers sorted out and leveled up, and then Lowe's sent their measuring guru to template our cabinets for the counter tops. That guy was a true artisan, and dealt with our weird shaped vintage farm sink without batting an eye.

Step #1: Check. 


At this point in the process, I'm getting pretty psyched. With the cabinets in position, we can decide on the countertop material and the cabinet colors. That's when the fun part starts!

Our old kitchen, while it had its charm (by that I mean plywood counters) wasn't going to hold a candle to our new Lowe's sponsored kitchen. 

Pretty freaking exciting folks.

Tuesday, April 8, 2014

Okay. You may have noticed.

After one skirmish too many, I was sent home from NBC's "American Dream Builders". It may shock and amaze you that I, always prone for a fight, hyper-dynamic, unrelentingly opinionated, utterly uncompromising, she-devil of a woman-- would not be well-suited for reality TV, but there ya go. Life will surprise you time and again.

Sadly, this is the face I make when I get eliminated.
Note to self: Look smarter the next time you get kicked off of a reality-tv show. 

Needless to say, I was honestly so disappointed to be sent home, though I suspect it was pretty evident in that last episode that I was more or less over the whole thing. I'm better equipped for design, not drama, and unfortunately, you should probably have a flare for both to be on a design-reality television show. In hindsight, that makes a tremendous amount of sense,  but somehow, I didn't quite see it coming... But as they say,

"Nothing ventured, nothing gained!"

The good news is that after you get the boot from NBC's American Dream Builders, you get to film a Lowe's sponsored follow-up segment to show the audience what you're up to next. And what I was up to next was heading back to our farmhouse to renovate our kitchen, so Lowes and an American Dream Builders film crew came along for the ride.

Talk about a silver lining!! 

I'm going to post all the nitty-gritty details in the next blogpost, but here's a sneak preview...


Oh-la-la! Look at our gorgeous new country kitchen!

Sunday, April 6, 2014

Serena & Lily major sale victory!

I just received my Serena & Lily totally-freaking-gigantic hurricane candle holders! These things are truly mammoth-- about 18" high-- and 12" across.

I spotted them during Serena & Lily's huge sale a few weeks ago and decided to take the plunge. At $20.00 a pop, I figured having a few to enjoy outside during the summer would be a good thing.

Not gonna lie-- I'm completely loving them. Albeit, I need to shell out for some larger candles, but even with the dinky candles that I had, the one on our dining room table already lends the room a lovely ambiance at night.

Total score. 

Unfortunately, this post isn't very helpful, because Serena & Lily have completely sold out of these huge hurricanes, but keep your eyes peeled for more... I found a couple of good candidates available at Restoration Hardware, but they're not that great of a deal. Maybe hold out for a sale???

**Ps. These hurricane candle holders would also make perfect terrariums if you're into that sort of thing...** 

Saturday, April 5, 2014

Perfect spring dinner!

John and I just whipped up this delicious spring dinner, inspired by the 10 minutes of sun and warm weather that we had earlier this week. I know it looks complicated because there are three separate recipes, but they're all super simple, easy to tackle, and utterly conjuring spring. Sadly, we're back to overcast-and-40, but maybe if enough of you cook this up too, we'll collectively channel Spring into full effect.

Worth a shot, right? 


Yield: 2 quarts, 8 to 12 servings *
*Note: DO NOT believe this "8-12 servings" rubbish. This recipe actually makes 16-24 servings. You could easily halve this recipe and still serve an army. We served four, and still have enough for another 20 people. 


Ingredients

8 tablespoons butter
8 small leeks (white parts only), trimmed and chopped
6 cups water
1 small baking potato, peeled and chopped
2¼ teaspoons salt
½ teaspoon ground black pepper
½ teaspoon cracked pepper
1 cup chicken stock
3 pounds fresh asparagus, trimmed, peeled, and coarsely chopped
1 cup heavy cream

Directions

1. In a medium-size heavy stockpot, over medium-high heat, melt the butter. When the foaming has subsided, turn the heat to low and add the leeks. Let them steep until they are soft, approximately 10 to 12 minutes. Do not let them brown.
2. Add the water, potato, salt, both peppers, and chicken stock, and turn the heat back up to medium-high. Let the mixture simmer for 15 minutes, until the potatoes are soft.
3. Add the asparagus and bring the soup to a boil for 5 to 7 minutes, until it has reduced by approximately a quarter. Remove it from the heat.
4. In a food processor fitted with a metal blade, puree the soup — in batches, if necessary — until it is very smooth, then stir in the heavy cream.
5. Put one serving of Perfect Sea Scallops in the bottom of each bowl before adding the soup.

Ingredients

2 tablespoons butter
1 tablespoon olive oil
1 pound sea scallops
½ teaspoon salt
¼ teaspoon black pepper
1 tablespoon minced garlic
¼ cup dry vermouth
1 tablespoon lemon juice
1 tablespoon chopped parsley

Directions

1. In a heavy nonstick skillet over high heat, melt the butter and oil together. Place the scallops, salt, and pepper in a medium-size mixing bowl, and toss the scallops in the seasoning.
2. When the butter's foaming has subsided, place the scallops in the pan and sauté them for 3 minutes, until a brown crust forms.
3. Turn the heat down to medium-low and turn over the scallops. Add the garlic, vermouth, and lemon juice and sauté for one more minute, then turn off the heat. Remove the scallops with tongs and place one serving in the bottom of each soup bowl before adding the soup.
4. To serve the scallops on their own, place them on a serving platter, pour the remaining sauce from the pan over them, and garnish with the parsley.

Savory Black Pepper-Parmesan Cookies


INGREDIENTS

2 LARGE EGG YOLKS, HARD-BOILED
2 CUPS ALL-PURPOSE FLOUR
1 CUP FINELY GRATED PARMESAN
1 TEASPOON KOSHER SALT
1 TEASPOON FRESHLY GROUND BLACK PEPPER
3/4 CUP UNSALTED BUTTER, CHILLED, CUT INTO PIECES
2 TABLESPOONS HEAVY CREAM 


INSTRUCTIONS

  • Preheat oven to 350°. Press egg yolks through a fine-mesh sieve into a food processor. Pulse with flour, Parmesan, salt, and pepper. Add butter and pulse until the texture of coarse meal. Drizzle in heavy cream and pulse just until dough forms a ball. Roll out between 2 sheets of parchment paper until ⅛” thick. Transfer dough with parchment to a baking sheet and freeze 10 minutes. Remove top sheet of parchment and bake 10 minutes; remove from oven, cut into 1½” diamonds, and bake until golden brown, 18–20 minutes longer. Transfer baking sheet to a wire rack; let cool.

Moving and shaking.

Okay, so we finished installing and painting our IKEA-sourced "pre-war pier mirror" in Brooklyn and it looks beyond awesome. Let me mention again that this mirror was originally the IKEA Songe mirror, which I piced up for a mere $99.00 at IKEA. Evidently the D-I-Y gods were smiling on me, because when I measured the Songe mirror was pretty much exactly the right size to fit between my two kitchen windows, and sits pretty much perfectly on top of the existing chair-rail in our kitchen. So pretty much, it's perfect. Yeah. I'm that annoying.

I actually initially wanted to do this project a few weeks ago, but hesitated because I didn't know where I was going to move the rest of the kitchen artwork if we installed the pier mirror. We have this gigantic vintage advertisement which was occupying the space between the windows, and this incredible painting done by Bonnie Miller that I'm so devoted to, so I was struggling to figure out how to renegotiate the location of those pieces...

But then when we got all of that new (free) bedroom furniture a few weeks ago (yeah. I really am that annoying) it all became clear. Move Bonnie Miller's beautiful painting into the bedroom, move the vintage advertisement where Bonnie's painting was originally, and hang the pier mirror in between the windows.

Perfect. 

Not only that, but there is something magical that has happened with the addition of Bonnie's painting in our bedroom. Waking up to it has added this bizarre illumination to our room. It almost makes the bedroom feel like it is twice as large-- like we're looking into another side of the room... I promise I'll take photos this week so you can see just how glorious everything is.

But take my word for it. It's glorious. 

Tuesday, April 1, 2014

You might have noticed...

... it's been kind of a crazy week for me. I made my first and second network television appearances on NBC's American Dream Builders, tweeted 10-gagillion tweets, facebook-ed like a mo-fo, and have just mastered the art of Instagram. Never say I didn't try to make myself a strong social media presence if this all goes south!!


I also co-hosted my first fancy-pants media event,  flew to-and-from Minneapolis to attend someone else's fancy-pants media event, and even managed to squeeeeeze in a 6-hour layover in Milwaukee without decapitating anyone, though I think the people at Southwest Airlines will agree that it was touch-and-go there for a while.


Point being, sorry I haven't blogged. I actually have been doing things-- tackling projects and being a bonafide D-I-Y-er, I've just been so busy, I didn't have much time to talk about it. But I'll get back in the swing of things tomorrow and get everybody up to the speed. In the meantime, feel free to geek out on the photos that you'll find if you click any of the red links shown above, or better yet, go to the American Dream Builders website and comment extensively about what a likable and vital character I am on the show. : )

No seriously. Tell them.