Monday, February 28, 2011

Renovate Brooklyn! Day Twenty-Four, Part Two: Oops! The Other Stuff Too.

So I guess I got a little carried away with my triumph over the arm chair, and forgot to mention the other things we managed to tick off our list yesterday. (Sorry John!) 


Kitchen Ceiling Fan: INSTALLED!


 Bedroom Light Switch: REPLACED! 

(I know this is a silly thing, but really it's such an improvement! I stand behind the idea that attention to these little details are what separate a house from a home. One is just a box for your stuff.)


Living Room Ceiling Fan: ...Not Quite...

Evidently, John needed a metal bracket thing that we didn't have in order to install the fan above my office area in the living room, but alas- we didn't realize that until after the local hardware store was closed. Hopefully we'll tackle that tonight, but it was still a good day's work!

Still on the list for the next few weeks/months:
-Pull down the drop ceilings in the kitchen, guest room, and our bedroom. OH GOD. 
-Repair the existing ceilings in the kitchen, guest room, and our bedroom. Also OH GOD. 
-Salvage the ceiling medallion currently dangling precariously above our bedroom drop ceiling and install it in the living room above my giant lamp-shade light. 
-Repair walls once the drop ceilings are removed. 
-Install portrait moldings in the kitchen, guest bedroom, and our bedroom. 
-Paint guest room.
-Paint kitchen.
-Install new fan with brighter light in our bedroom and move our existing little ceiling fan into the guest room. 
-Possibly put up a partition in the guest room to create a walk-in closet separate from the sleeping area. 
-Install wood floors. 
                                                                                                      

Easy-pee-sy right? Just a couple of quick things to do and we'll be all finished. Oy. 

The deal with the drop-ceilings: This is obviously one of the biggest tasks ahead of us right now, and our initial temptation would be to leave the ceilings intact where they are and call it a day. But we are motivated by the knowledge that 12" above our existing drop ceilings, there are beautiful (though decrepit) tin ceilings in the kitchen and (equally decrepit) ornate plaster molding ceilings in the bedroom and guest room. There is also an enormous ceiling medallion that is hanging above our bedroom drop ceiling, which we're hoping to save and then reuse in the living room. How do we know all of this, you ask? Because a while ago, the electricity went out in the back half of our apartment and an electrician (of questionable competence) went from room to room cutting 18" X 18" holes in the ceilings to figure out where the short was happening.


I remain convinced that there has to have been a better way to do this, but it did give us the chance to look inside all of our ceilings. It still makes me roll my eyes when I think about it. Afterward, we went around and closed up all of the holes except for the one in the kitchen, which is pictured above with the tin peeking out above the dropped ceiling. I left that one open as a constant reminder -- and to fuel my motivation to one day take down the drop ceiling altogether. Hopefully that day is almost upon us, though I'm pretty sure it is going to be an unholy mess when we take them down.

Let the adventure continue! 

Renovate Brooklyn! Day Twenty-Four: Don't Quit Your Day Job.

So I finished the chair.
Holy mackerel. Reupholstery is no f--- joke.

But with no further ado: 
The Upholstered Chair Hall of Fame...


BEFORE: The chair, stripped down to its bare bones. Remember, before it looked like this, it was a mass of duct tape, packing tape, and decaying damask. It is still gross to think about. Ew. If you want to see all of the various stages the chair went through, click here to revisit that entry.
AFTER: Ta-da! The chair, revitalized!
Note that the fabric on the chair is actually the shower curtains I was previously using to separate Mummy's guest bedroom from our hallway. I only needing 1 1/2 shower curtains to reupholster this chair, so the other ones remain hanging to provide privacy for our next guests.


A couple of awe-inspiring close-ups on the chair. Hammering in each of the individual nail heads was a delight! The idea is that they are a tidy little row, but these ones look like they were installed by a drunken miner. What can I say? I've got a gift.

As someone who does a lot of Do-It-Yourself projects, you frequently encounter these projects that are really about endurance and patience and less about skill, so you're like "Sure! I can be patient. I have endurance." Well, for one thing, I'm not really that patient so that went out the window right away, but for two, this project was not that kind of project. This project is all about skill and actual ability, and as it turns out, I have very little of either of those in this particular field. I have a whole new appreciation for every upholstered thing I have ever encountered. How do they get the fabric to stay on!?!


I'm seriously considering taking an upholstery class solely to illuminate some of the unsolvable mysteries I have experienced while working on this god-forsaken chair. "Free chair" my eye. It cost me my soul and spirit! Okay, maybe that's a little overboard, but blimey! This was hard. It's possible that at one point I said to John that my recovering this chair was the worst thing to happen to it since it was put out on the street a few weeks ago.

At right: the chair "in situ" as they say. I still have some extra fabric left over, not including the other curtain, and I'm planning to make a throw pillow out of it this weekend. I can put it on the bed and get a nice link between the chair and bed linens, and then the fabric doesn't go to waste either.

The total budget for the revitalization of this chair, for those who are wondering, worked out to:
        
        $35.00 for webbing, batting, thread, etc.
        $20.00 for one and a half shower curtains
   +   Three Nights when I could have been doing something more fun  
        $55.00 

(Oh! Not to be forgotten were the two nights of sleep lost while I fretted about getting bed bugs. They have to be worth something too, right?)

Despite all of my griping, I am actually tremendously pleased with the outcome of this project. It looks great in the room, used fabric I already had, didn't cost much to do... I just wish I was slightly better at doing it. But hey-- almost free is a great price for a new chair.

 Onto the next project! Arriba! 

Sunday, February 27, 2011

Renovate Brooklyn! Day Twenty-Three: Back To The Grind.

Alrighty. We're back to work in Brooklyn. After an immensely stressful but successful week of work, we're ready to get back to working on the apartment. I have vowed to make headway on reupholstering the chair today and John is going to tackle a bunch of little odds and ends that need doing. (I'd love to say that I will "finish the chair!" but it's such a bummer not to achieve one's goal, so I'm setting my sights low. It's an optimistic morning in the Salway-Moskowitz household...)

John is going to take care of a bunch of little things that remain undone... We're installing a new fan in the kitchen and then moving the old kitchen fan into the living room, over my desk area. This is because the new fan we have (salvaged from a professional project I was working on) is bigger and brighter than the fan we've got in the kitchen now.


Although it's a pain in the neck, it will be better to have the brightest fan in the kitchen so we don't slowly go blind chopping onions in the dim light of our old fan. Pictured above is our current kitchen light, and at right, the new fan. We're stoked. Doing the fan swap is doubly exciting because it will also bring another overhead light (however dim) into the office area where there is currently none. I joke that John's declining eye-sight stems from the fact that all of our overhead fixtures are fans instead of lights, so every room is in a perpetual state of "mood-lighting". Great for ambiance, but god forbid you try to read a book.

There is also this really ugly light switch in our bedroom that he's going to swap out for something less glaring. I mean look at that thing! (Pictured left.) It is massive, "ecru", dinged up and dingy. It's got to go. It is these little (aka. annoying) details that can really suck the energy out of a project. You know- when you're painting a room or tearing down a wall- you get such a tangible feeling of change, truly visible results. But these little details kind of separate the boys from the men, so to speak. It is that whole "Doing it right or just getting it done" philosophy that comes up time and again in home design projects.

               Onward we march!

Thursday, February 24, 2011

Renovate Brooklyn! Channeling Our Next Project.

I know, I know... First I need to finish the reupholstery of the chair, no need to nag. But once that's accomplished, I'm plotting to paint the living room floor. I had this stroke of genius (or I hope it was genius) that it would be fabulous to continue the checker board pattern from the kitchen linoleum tiles into the living room by painting the same pattern onto the living room floor in the same colors-- almost like an abstraction of the floor from one room to the other. Meta.

*In the photo at right, you can see where and how the living room and kitchen floors meet right now. Please ignore the tumble weed of dog hair in the living room portion of this photo. Seemingly house-keeping is also on the back-burner until my work load lightens up.


I went online and tracked down some examples of painted floors to bolster my enthusiasm and simultaneously convince any skeptical blog-readers, but I'd love to know what people think of this plan. Preferably before I take the time to tape the whole thing out in checker-board formation.

This might be a scarier undertaking if our floors weren't already so hobbled and sad. The saga of the floors began in June of 2004, when we moved into this apartment. Part of what made it so affordable was its wayward (aka. wretched) condition, which was particularly emphasized by the wall-to-wall grey-grit industrial style carpeting. This stuff was like walking on dusty, musty, very icky sand paper and served as a constant reminder of the parade of people who had lived in the apartment before us (most recently, a very old woman). We optimistically pulled up one corner of the carpet, saw wood floors, signed the lease, and got to work.


Sadly, it turned out that was the only corner with wood flooring and everything else was a mixture of vinyl self-adhesive floor tiles and bare plywood subfloor. We decided that was still preferable to the carpet and up it came and out it went. Good riddance!

I am embarrassed to say the floors pretty much stayed that way for the next 4 years. I tried to hide them below area rugs and runners, but there was no denying that we didn't really have a floor, just a surface that we were walking on. It wasn't until recently (about a year ago) that I declared that things had to change and boldly painted the floors white with a glossy white porch & deck paint that I hoped could contend with the constant running about of two quasi-adults and a very energetic pitbull. In its defense, it has actually held up reasonably well given the circumstances.

Point being, there is not much at stake except for my own time and energy (the former of which I seem to have too little of, the latter of which I seem to have an infinite amount of...) And if it looks like we're living in a psychadelic carnival tent when I finish, well I'll just roll another coat of white porch & deck over the whole affair and we're back where we started.  Eventually, we really want to install a wood floor throughout the apartment, but that will be the coup-de-gras at the end of this renovation.

In the meantime, like Mummy always said when I was a kid (and maybe thought a couple times this past week), I have to finish one project before I am allowed to start the next. No frenetic A-D-D-esque flitting about for me. Though painting the floor does seem far more enjoyable than continuing with the monsterous task of reupholstery............

Oh the perils of over-ambition combined with under-funding!

Wednesday, February 23, 2011

In the meantime...

This week is crazy with work, so finishing the chair is going to have to take a back-seat to actually having a job. (Booooooooooooo.) But I thought everyone could keep busy with some other reee-diculous recipes that Mummy and I explored this past week.


Veal Confit with Lynne Rossetto Kasper
http://splendidtable.publicradio.org/recipes/confit_veal.shtml


When you read the first recipe, it sounds complicated but is actually more time consuming than it is labor intensive. If this strikes your fancy, make sure to plan a couple days in advance. This is also an incredibly economical meal. We bought our veal breast at Fairway for about $6.00, and it fed five people (Brennen and Julia can attest to the deliciousness of this recipe if you have any doubts!)


We served the veal confit over the easiest, most consistently delicious risotto recipe I've found, which you too can enjoy here: 
http://www.marthastewart.com/recipe/marthas-spring-risotto-with-peas-and-zucchini

Serves 6


  • 2 cans (14.5 ounces each) reduced-sodium chicken broth
  • 3 tablespoons butter
  • 1 to 2 large zucchini (1 pound), peeled and cut into 1/2-inch cubes
  • Coarse salt and ground pepper
  • 1/2 cup finely chopped onion
  • 1 1/2 cups Arborio rice
  • 1/2 cup dry white wine
  • 1 cup frozen peas, thawed

Directions

  1. Heat broth and 2 1/2 cups water in a small saucepan over low heat; keep warm. Meanwhile, melt 2 tablespoons butter in a 3-quart saucepan over medium heat. Add zucchini; season with salt and pepper. Cook, stirring often, until zucchini is golden, 8 to 10 minutes. With a slotted spoon, transfer zucchini to a plate.
  2. Reduce heat to medium-low. Add onion; cook until soft, 5 minutes. Season with 1 teaspoon salt and 1/4 teaspoon pepper. Raise heat to medium. Add rice; cook, stirring, until translucent around edges, about 3 minutes. Add wine; cook until absorbed, about 2 minutes.
  3. Cook, adding 1 cup hot broth at a time (stir until almost all liquid is absorbed before adding more), until rice is tender, 25 to 30 minutes total.
  4. Add zucchini and peas; cook until peas are bright green, 2 minutes. Remove from heat. Stir in remaining tablespoon butter and Parmesan. Serve, topped with more cheese.

I actually usually use green beans, baby green peas, and most recently we also added steamed asparagus, but you can use whatever veggies you've got handy. One addition that John developed is to soak a few strands of saffron in about 1 cup of stock, and then mix it into the risotto as one of the cups of hot broth during Step 3. This gives the risotto a lovely golden color and a tantalizing aromatic quality that is sure to please. That said, it isn't vital if you don't have the saffron handy and is still delish regardless. 


My friend Seth claims it is some of the best risotto he's ever had. If you knew Seth, you'd know he doesn't hand out compliments willy-nilly, so it must be a good recipe.

Until this weekend... Enjoy! 


Renovate Brooklyn! Day Twenty-Two: Holy #@$%! Upholstery Is Hard Work!

I'd love to say that Mummy and I prevailed over the reupholstery of the street-salvaged arm chair this weekend, but alas, we were way-laid by the temptations of antiquing, multiple side-projects, cooking extravagant meals, and generally toodling around together, so we only got about 3/4 of the way there. And the last 1/4 is clearly proving to be the most difficult part. 

I will keep updating everyone as I progress, but here's where we stand at the moment. After stripping the chair of all of its (not bug-ridden) fabric, I had to remove all of the old nails, staples, and nail-heads from the frame. This was a loveless, tedious, rather sharp task, but someone had to do it and I was the man for the job.

Above, you can see the chair dressed as Frankenstein. This is actually after I stapled the webbing onto the frame. As any good interior designer/upholsterer will tell you, the best way to start a project is to vastly underestimate how much of a material you'll need, and then drive into rural New York State where it is incredibly difficult to find additional quantities of the materials you didn't buy enough of to begin with. Thus, my webbing actually consists of normal webbing, and then some random strips of fabric I happened to have lying around. For those of you unfamiliar with this process, this is the way we described it to John: The wooden chair frame is like the skeleton of the chair, the webbing like the muscles and tendons, the batting/stuffing like the fat, and the fabric is the skin-- keeping everything inside the body of the chair.

The evening I finished the webbing of the chair, we made a spectacular meal of Coq Au Vin, prepared with a marvelously fresh chicken purchased from a farmer down the road from our house. (Okay, for all you detail-zealots, it was a marvelously fresh chicken when we bought it in July, but then we froze the billiow out of it, so that's how it was "farm-fresh" in February.) 


We served the Coq Au Vin over Chestnut Polenta, a recipe we found on the NY Times website and then slightly adapted.

For the polenta:
1 cup coarse-ground polenta
Kosher salt
1/4 cup chestnut flour (see notes)
Freshly ground black pepper

To make the polenta: In a medium pot, combine the polenta, 4 cups water and 1 teaspoon salt. Bring to a boil and whisk continuously until the mixture comes together. Lower heat to a simmer and stir often with a wooden spoon until tender, about 30 minutes. Stir in the chestnut flour and cook for 3 minutes. Season with salt and pepper. Remove from heat and cover.

Our changes: 
I have yet to find chestnut flour, though I confess to not looking very hard. Instead, I prefer to put jarred chestnuts in a zip-loc bag and hit them enthusiastically with a hammer. This breaks them up into lovely morsels which hold up well in the polenta so you get these tasty little chunks of chestnuts mixed in.

Likewise, the polenta I usually use claims to cook in 3 minutes, while the NY Times recipe says you cook it for half an hour. I just cook it until it tastes ready-- which is usually somewhere in between 3 & 30 minutes. Also, I add extra salt and maybe a drizzle of olive oil to add a little more richness to the whole affair. Whether you make these little adjustments or not, it is awesome.

And if you've got the ill chestnut-flour connect, let me know!

Okay, back to the chair. So after that delicious meal, I had a sudden brilliant idea as I was climbing into bed on Saturday night. I should paint the frame of the chair!!! Which is what I did, as shown in the picture above. I lightly sanded down the frame, and then hit the whole thing with two coats of Benjamin Moore's Decorator's White, which is what I had handy down in the basement.


I am trying to channel the charming eclecticism of a chair like this, minus the $2,000.00+ price tag. Granted, the chair from Horchow - pictured above left - did not come with the risk of bedbugs.

Next up-- adding the batting. I did a couple of layers, stapling them on like a pro to make sure that it was nice and comfy, although if it ends up in our bedroom, my clothes are more likely to sit on it than I will. But, they'll be sitting in style! At this point, one could compare my chair - above right- and the Horchow chair and think we were actually getting pretty close to completion, but sadly the worst was yet to come. The actual upholstery.

And wow! Am I out of my league! This is definitely a "blind-leading-the-blind" operation, as neither Mummy nor I have the foggiest idea what we're doing. And now that she has departed, I'm on my own to figure this riddle out. Oy.

So that's where we are at this point. Mummy came, we all survived successfully, and then she left, leaving me with the remains of an incredibly ambitious project to complete unescorted. Oddly, this seems harder than tearing down the walls. Hmmm.

Hopefully progress is in my future! 

Saturday, February 19, 2011

Renovate Brooklyn! Day Twenty-One: Renegade Design 101.

So we're not exactly Lorenzo Lamas (heart-throb pictured at left) but Mummy and I are becoming A+ Design Renegades. For the past week, I have been eyeing up a lovely/revolting chair frame that has been sitting outside of a parking lot on North 1st Street between Bedford and Berry. To describe it as lovely/revolting may seem confusing, but if you'd met the chair, you'd know what I meant. The frame is made of beautifully carved wood, delightfully diminutive, and I think will fit quite nicely into our new bedroom. The upholstery, however, was absolutely, indescribably disgusting. Really. The outer most layer was actually just layers of duct-tape and then below that, packing tape circa 1985. Before that, years of horrible torture had been bestowed upon blue damask, leaving nothing but a trail of tears behind. So yeah. It was gross. 

Yesterday, I was finally able to muster the courage to approach the chair. Fear of bugs, needles, and neighborhood embarrassment had previously deterred me, but having the company of my mom bolstered my confidence and we went boldly forth. Armed with exacto-knives, a contractor bag, and a bottle of Fantastic, I declared that we should strip the chair down to the wood frame on the street, so if we encountered anything unsavory, we could just run. It soon became apparent that we were definitely going to encounter something unsavory, and we had to weigh whether or not it was worth it.

At this moment, Mummy daringly touched the seat of the chair to test the cushions, proclaimed that the springs were actually in very good shape, and we were done for. The chair would be stripped! This whole endeavor was made more amusing to see because both of us were dressed up in our urban finery, planning for a day on the town that was to follow this adventure. There I am, black boots, black pants, silk blouse and this fabulous vintage Valentino overcoat that Mummy found in Minnesota, and there is Mummy, black boots, black pants, lovely lilac merino sweater... both of us stabbing away at this filthy chair on North 1st Street. It was a sight to behold, and the guys at the construction site across the street had a good laugh at our expense.


It should be said LOUD & CLEAR, nary a bug was seen. We did find lots of other prizes though! 26¢ in loose change, a sizable piece of birthday themed wrapping paper stuffed into the seat, and a couple of "hose-saver-heel-liners" from the seventies, still in their packaging. Sold for 15¢ each. Who knew? It should also be said that I still had nightmares last night about bed-bugs. God, I don't want bed-bugs.

So, this week-end's goal is to begin (finish?) reupholstering this chair, using the fabric from my $10.00 shower curtains that were originally Mummy's "wall" in the guest room. She gracefully volunteered them, privacy be damned! (Plus we're up in the country now, so she'll only have to sleep sans-wall for one night once we're back in the city.) We'll keep you updated as this project progresses.

Neither of us have ever attempted such a courageous feat, 
so cross your fingers!! 

Thursday, February 17, 2011

Renovate Brooklyn! Day Twenty: The Guest Suite.

Ha. So it isn't exactly a suite, and it doesn't exactly qualify as a room per se, but considering it is a "guest room" in our little apartment in Williamsburg, it's not too shabby.


At this point, we've divided the room into two by suspending a series of curtain (actually colorful shower curtains that I picked up on clearance from Marshalls.) Someone pointed out that it feels vaguely reminiscent of a room in a hospital, which isn't quite the tone we had hoped for, but I suppose hospitals use curtains for privacy too, so there ya go. The bigger of the two rooms is currently serving as the "guest room" and the smaller of the two spaces acts as the hallway leading to our bedroom and also functions as a walk-through closet.


Considering the anarchy we've lived with over the past month, all of this is feeling pretty darn civilized! And as we speak, Mummy is sound asleep in the guest room so that seems like a pretty good review too.

Victory Is Ours!

Wednesday, February 16, 2011

Renovate Brooklyn! Day Nineteen: The Mother Arrives!

Today's the day!

In just nine short hours, my mom touches down at La Guardia airport and we really put the apartment to the test. Will all of our hard work be able to stand up to the brutal scrutiny of one Lynda Salway? Only time will tell.

(My mom is actually rather nice, so please excuse the hyperbole. I'm just trying to make this sound as intense as possible for the sake of "The Internet".) 

Here is what we have to show for our last few days of servitude. You know you're really under-the-gun when you seriously consider calling off your Valentine's Day plans in favor of painting a room. Deee-pressing.*

In the photos at right, you can see the wall where there was once a storage loft, and then below, the same wall once the loft and small support were removed. Taking these two partitions down completely transformed the room-- it made the ceilings feel higher and made the foot-print of the room much less constricted. I can't believe we have lived in this apartment for seven years, and it took about two hours to make this room 100% more habitable. We are idiots.

The new wall color, by the way, is called Healing Aloe by Benjamin Moore (#1562). I'm pretty sure it is the most beautiful paint color I have ever encountered. Seriously. There is a glass-like quality to it, almost as though it is the very color of light. I know I sound like I am going to ask someone to pass the joint now, but if you could see it, you'd know exactly what I meant.


We're pretty thrilled with the outcome of our new bedroom. It is marvelously bright and sunny, and really feels very "whole". I think a problem that people our age frequently encounter is that everything looks and feels a little cobbled together. You've got this crummy furniture from college, probably some odds-and-ends that your parents gave you, and very little money to replace those things with anything new or even remotely coordinated. It sucks to come home to a place that feels like you're living in the Salvation Army's furniture department.


In our bedroom, I tried to unify our furniture by painting it the same color. The two mismatched night-stands are both painted Decorator's White (Benjamin Moore) and then linked together again by the pair of matching bedside lamps. Our dressers were also mismatched and my first temptation was to paint them Decorator's White as well. But then I remembered that John lives in our apartment too and that uber "Shabby-Chic-Cottage" just isn't the most male-friendly aesthetic, so I decided to live-it-up a little and paint both dressers that insane fiery orange. Literally, I think the paint color is called "Flame." When I did it, it seemed totally out of left field, but I've actually grown accustomed to the color and think it creates an awesome contrast with the cool, glassy tones of the wall color and bed linens.

And considering the room looked like the photo below on Saturday afternoon, we've made a lot of head-way. I'll include photos of the guest room later today, so you guys can see where the guest of honor will be bunking up this week.


*For those of you who are concerned for our love-life during this grueling renovation, fear not. We didn't actually cancel our Valentine's Day plans-- praise be! We went to see True Grit at the charming Cobble Hill Cinema and then had a smashing meal at Prime Meats in Carroll Gardens. If you haven't been there, definitely check it out. They have a lovely, mellow ambiance that is très romantique, and the menu is tremendous. We ordered the Roasted Bone Marrow, a Farm Salad with Bacon Salad and Bacon Dressing, and a Steak Frites to split. Delish!

Monday, February 14, 2011

Renovate Brooklyn! Day Eighteen: Full Disclosure.

Everything is moving along in Phase Two!

The Goal:  Turn what was once my office into our bedroom, and then turn what was once our bedroom into a guest room.

If That Is Confusing: You can consult the Before & After Floor Plans here...

However, things would be moving along at a slightly faster clip if I had done more work this weekend. Instead, I was lured to the Whitney Museum by Justin-- promises of an Edward Hopper exhibit made the invitation impossible to refuse. And then it seemed inconceivable to part ways without a glass of wine on the Upper East Side... And so, I didn't actually start working on removing the platform until around 1:00 on Sunday afternoon. (Sorry Mummy.)

Here's where we are so far...

                                  Sunday Afternoon: Approx. 1:00                                   
               Sunday Afternoon: Approx. 2:00 - Storage Loft Cleared                   
I'm sure some of you are wondering why on earth we'd remove this precious gift of storage space when we were so lucky to have it to begin with. There is rhyme to my reason... The loft itself does provide a good deal of storage, but the real issue is with the little 24" wall that supports the loft. It juts into the room just enough to make it almost impossible to put a full-sized bed in the room, or certainly impossible to put it anywhere nice. 

Also, as it turns out,  I am a bit of a hoarder. I don't know how this happened because my mom is a stealth organizer and has a place for everything and everything in its place, but deep inside I desire to keep everything "just in case", and having that storage loft was only aiding the habit. It was actually slightly therapeutic to sift through everything up there and make a mountain of stuff to be sent to Salvation Army.*

I assure you, once we get our bedroom set up in there, it will become more apparent that this was actually an act of aesthetic genius and not an urban sacrilege.

*FYI. If you live in Williamsburg, Salvation Army is about to hit the mother-load, so you should swing by this coming weekend to see what diamonds I have dropped off.

       Sunday Afternoon: Approx. 3:30- Loft and Support Wall Removed

 
We will continue with additional progress reports as 
the count down counts down!

2 Days Left! 


Saturday, February 12, 2011

Renovate Brooklyn! The Clock Is Ticking.

The count-down continues. My mom arrives in Williamsburg in just 4 short days, and the guest room is still in a state of total disarray.

John has to work today so we had to stay in the city this weekend. Hopefully this will allow/inspire me to tackle the next project-- taking everything off of the storage loft in the "guest room" and then tearing down the loft platform. Right now it's noon and I'm still in my pajamas, so construction seems a long way off, but we will see.


Fingers crossed, terror will be the motivation to 
get this ball rolling! 

Friday, February 11, 2011

Renovate Brooklyn! Days Sixteen & Seventeen: What We Did This Week...

Good grief. Somehow even the smallest projects seem to snow-ball into these monster overhauls of the entire house! But we have come out on the other side and here's what we have to show for it!

My new little desk in the closet. I found the perfect place for our old chandelier.

The "work" side of the closet. *Note the tool belt hanging off the shelf. This is a new one to replace that smelly one John bought in a thrift store. I'm all for second-hand, but that was a particularly pungent tool belt! An early Valentine's Day present from me...


Now for the confession portion of this blog entry. For those with a keen eye, you may have noticed that we didn't actually manage to fit everything back into the closet. The towels and bed linens now reside in the "laundry-room" (closet) and the danish-style bookcase that was in left-hand closet has moved into the living room area.

I'm on the fence about the bookcase in this room, so I'd love feedback if anyone has any opinions. (I know you do! This is the internet- everyone has an opinion!) In the pictures to the left, you can see it first with the bookcase and below, without. In the bookcase's defense, it does actually match the rest of the wall-unit in the living room.


It may seem like we haven't accomplished much, but it's been a busy week for us. We had two of our great friends, Phoebus and Justin, over for dinner last night, which was considerably more fun than reorganizing our closets. We made a smashing dinner of skirt steak which was marinated in a garlic and olive oil sauce, and served with a side of "Cuban Sweet Potatoes." I have no idea if these are actually Cuban, but that's what my mom always called them. The recipe is as follows:

Cuban Sweet Potatoes
Ingredients:
3-4 Sweet Potatoes, skin-on and scrubbed clean, cut into 1/4" slices and then quartered.
Lime Juice
Olive Oil
Salt & Pepper
Fresh Cilantro

Instructions:
Preheat oven to 375 degrees.
Cut up the sweet potatoes and toss them in olive oil, enough to nicely coat them but not drench them. Throw them onto a baking pan, and cook for 30-40 minutes, tossing them around every 10 minutes +/- so they don't get too cooked on one side. I like mine a little browned, but this is a matter of personal preference. Once they're cooked through, remove from oven and let cool while you make the dressing. In a big-ish bowl (big enough to accommodate your sweet potatoes) pour 1/8 cup of lime juice (fresh or from the bottle), add salt & pepper to taste, and then whisk in 1/4 c. olive oil. Taste and then add more oil or juice to reach your preferred amount of tart vs. savory.

Now add the sweet potatoes to the bowl and using a flexible spatula, toss them in the dressing. (The flexible spatula keeps the soft sweet potatoes from breaking up too much as you toss them.) One coated, sprinkle with fresh chopped cilantro to taste, and serve.

These are like crack. Once you start, you just can't get enough. Except unlike crack, sweet potatoes are rich in fiber, anti-oxidants, and ridiculous amounts of Vitamin A. So that's way better.

Por Cuba Libre!

Thursday, February 10, 2011

Ps. The Count Down Begins!

**A quick reminder that my mom descends upon Brooklyn in exactly 7 days. As of right now, the guest room looks like this: 

And has to be accessed through our bedroom. Awesome. I wonder how much we can get done before she gets here????

Eeeeeeekkkkkkkkkk!

Wednesday, February 9, 2011

Sneak Peek: The Perils of Doing Something Right The First Time.

The title says it all. John and I merrily commenced reorganizing our living room closets and almost immediately ran head-long into a quandary. Do it "right but it takes longer" now, or "regret it later but get it done" now? Anyone who has ever done any kind of home renovation project has encountered this conundrum. The overwhelming desire to get it over with so that you can bask in the rewards of completion contend with the daunting knowledge that if you don't do it properly, you'll be cursing under your breath for years to come...

And so, we decided to do it the right way. The right way entails  removing the little partition that separates the right closet from the left closet (not load bearing- I promise- it's literally a single piece of drywall), reconfiguring what goes where, and then fastidiously sorting through the tools and shmeg to thin things out before they're all reorganized and put back in. I have this pipe-dream plan to also fit my filing cabinets and another desk top inside the closets too, but that is tricky because we still want all of the drawers and cabinets to open when needed. Ugh. This is like Tetris for home design...

The upshot is that we've already gone through the big Dresser-From-Hell that was full of tools and supplies and now they're all beautifully organized in John's new tool chest. He keeps walking past it, opening the drawers and then beaming like a proud father. He gets particularly excited by the drawer with the bolts, screws and nails in it... If you've ever been in the middle of a project and just need that one (#%&!) screw to make it work but can't find it because your tools are all in the Dresser-From-Hell, you can understand the sense of calm that John is feeling when he looks into those drawers. So full of promise! Hopefully by the end of tonight, we'll have something glorious to show for all this hardwork...

Fingers crossed!

Monday, February 7, 2011

Renovate Brooklyn! Day Fifteen: Good Grief.

After dinner tonight we're going to assemble this rad tool chest thing that John received for his birthday (Thank You Michael and Sally Moskowitz!)
 
We're going to put it into one of the closets in the living room in the hopes of getting control of the tool/linens/cleaning supplies/assorted-junk-we-can't-put-anywhere-else situation. Now for the big reveal... I am going to show you the closets in their EXISTING CONDITION. Please don't judge.

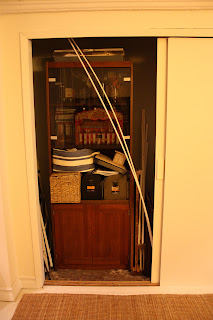
(To your left, please note the stacks of office supplies, lots of wood moldings squeezed into the closet, and a mini-model of a modernist potting shed that I once hoped to build.)
Once we've assembled the tool chest, we'll also organize the closets, and then we can do a "compare and contrast". Egads! This is like revealing your most intimate secrets on the internet... Who would ever do that willingly??? Evidently, I have officially joined the ranks as a "blogger".

(This closet is sooo much worse! Yes, that is John's spackle bucket sitting next to our towels and above our sheets. Stacked on top of that are a couple of paint trays, and then in one corner we have an extremely accurate reconstruction of the leaning tower of Pisa, built out of paint cans.)


This is actually what most of these drawers look like right now- just brimming with tools. I can't believe I am putting this online. The shame! I am definitely going to hear about this from The Mother Figure! 


If you're so inclined, you can see John's new tool chest here: